
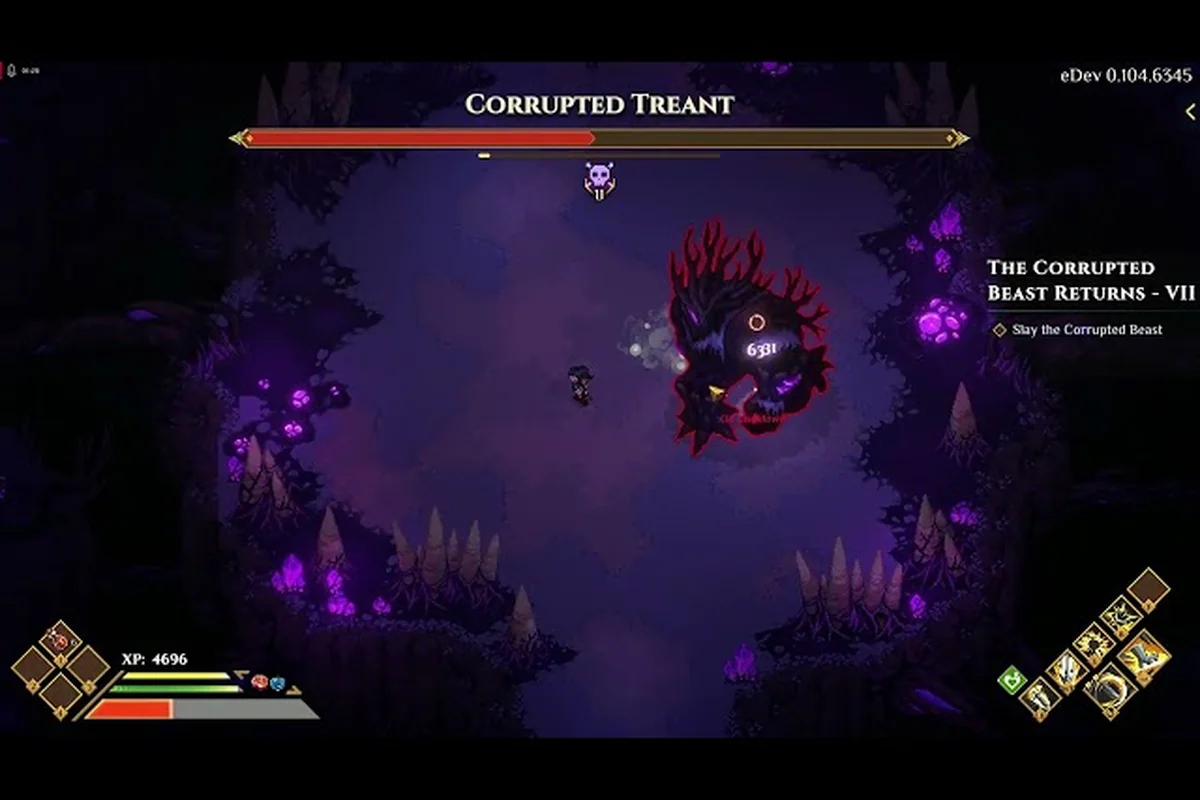
How Dimraeth's Souls-Lite Combat System Actually Works
Dimraeth's combat system borrows the deliberate, weighty feel of Souls-lite design but layers it with a 1-8 player co-op fantasy RPG shell, five-slot spell loadouts, and stamina-gated universal magic. Every swing, block, roll, and spell you cast draws from a single shared stamina pool, and recovering that pool quickly is the difference between a clean parry into riposte and a stagger that ends your run. According to the Dimraeth on Steam listing, the loop is built around reading enemy telegraphs, managing stamina before you commit to attacks, and mastering parry, block, and dodge to create counterattack windows.
The system rewards patience over button mashing. Enemy wind-ups are clearly telegraphed through stance shifts, glowing weapon trails, and audio cues that travel further than the hitbox itself. When you successfully read a tell, you have three valid responses: dodge through the attack, raise your shield for a stamina-draining block, or time a parry to stun the enemy and open them for a critical counterattack. Each choice spends stamina differently, and understanding those costs is the foundation of every encounter in Early Access.
Dimraeth's six launch classes interact with this loop in distinct ways. The Brawler leans heavily into dodge and parry because it lacks long-range options, while the Magician uses spell slots to control spacing before committing to a melee swing. Ranged classes such as the Shadow archetype must keep distance and rely on rolls to reset angles, because most elites will close the gap in two or three strides. The same stamina economy governs all six, which is why learning the basics in the starting zone pays dividends well into the endgame, and pairing that knowledge with a structured run through the Dimraeth progression system guide helps you match combat upgrades to your act-by-act milestones.
Core Combat Stats Every Player Must Track
Before you can plan a rotation, you need to understand the four underlying values that drive every encounter: stamina, poise, equip load, and spell charges. These stats do not appear as giant floating numbers during combat, but their effects are visible through animations, recovery windows, and the rate at which your actions deplete resources. The table below breaks down the role each stat plays in the Dimraeth combat system.
| Stat | What It Controls | Combat Effect | Common Mistake |
|---|---|---|---|
| Stamina | All physical actions, blocking, and spell casts | Empty stamina = stagger and free enemy hit | Spamming attacks without checking the green bar |
| Poise | Resistance to mid-attack flinching | Higher poise lets you trade hits in tight windows | Equipping heavy armor and assuming you cannot be staggered |
| Equip Load | Roll speed, block efficiency, and stamina regen | Over 70% load = fat roll, slower stamina refill | Wearing full plate as a Magician and losing all mobility |
| Spell Charges | Five-slot universal magic pool | Each cast drains charges, refills at rest points | Burning all five slots before a boss pull |
Stamina regen is the single most important recovery metric. When you stop committing actions for roughly one second, your stamina bar begins refilling, but the refill rate is throttled if your equip load exceeds 70% of the maximum. This is why min-maxing weight matters even for caster builds, because a fatter roll against a boss swing often costs you the entire encounter. Poise works differently: it is a hidden threshold value, and once an enemy hit exceeds your current poise, you are locked into a stagger animation that disables blocking and rolling for the duration.
Equip load and stamina are linked in a way many new players miss. A medium roll still lets you chain two attacks and a parry back-to-back, while a fat roll usually only fits one attack before you must wait for regen. The community refers to the 30%/70% breakpoints as the "comfort zones" for stamina management, and most optimized builds sit comfortably under 30% equip load to preserve that medium-roll freedom.
Stamina Cost Reference Table
Stamina costs are not displayed numerically in-game, but community testing has mapped out approximate values for the most common actions. Use this as a baseline until you build your own internal feel for the costs.
| Action | Approx. Stamina Cost | Recover Time | Notes |
|---|---|---|---|
| Light Attack | 8-12 | 0.6s | Cheapest commit, ideal for poking |
| Heavy Attack | 20-28 | 1.0s | Big stagger but high cost |
| Dodge Roll | 15-18 | 0.4s | Directional i-frames are short |
| Shield Block | 8-14 per hit | 0.8s | Costs scale with enemy attack power |
| Parry | 4-6 | 0.3s | Low cost, but precise timing window |
| Spell Cast | 12-30 | 1.2s | Cost scales with spell tier |
The cheapest reliable action in your kit is a parry, but it carries the highest precision cost. A failed parry leaves you open for the full duration of the incoming hit, and many bosses will follow up with a combo that empties your stamina on the second swing. This is why the standard combat flow in Dimraeth starts with a light poke, waits for the telegraph, then responds with a parry or dodge rather than trying to parry every attack in a combo.
Telegraph Wind-Ups and Defensive Response Choices
Telegraphs are the visual and audio signals an enemy broadcasts before a damaging hit lands, and learning to read them is the single biggest skill gap between new players and veterans of Dimraeth's Souls-lite combat. Every enemy in the game, from the goblin skirmishers in the Earlwood Village outskirts to the world bosses in the Wildwood Forest, follows a consistent pattern: wind-up, committed swing, recovery, then repeat. Your job is to identify the wind-up and choose a defensive response before the committed swing lands.
There are three telegraph categories in the current Early Access build. Short telegraphs last around 0.3-0.5 seconds and usually precede fast, single-hit attacks. Long telegraphs last 0.8-1.5 seconds and signal heavy committed swings or charge attacks. Combo telegraphs chain multiple swings together with brief pauses between each hit, and they are the most common cause of stamina depletion because players try to parry the first hit and then run out of stamina blocking the second.
Telegraph Categories and Counter Responses
| Telegraph Type | Duration | Visual Cue | Audio Cue | Best Response |
|---|---|---|---|---|
| Short telegraph | 0.3-0.5s | Quick weapon flick, foot pivot | Light swoosh, single grunt | Dodge through or parry |
| Long telegraph | 0.8-1.5s | Raised weapon, full body wind-up | Heavy shout, drawn-out growl | Back away, punish recovery |
| Combo telegraph | 0.3s × 3-5 | Repeated stance shifts | Rapid successive grunts | Block first hit, dodge the rest |
| Charge telegraph | 1.0-2.0s | Crouched stance, glowing eyes | Roar or horn blast | Dodge sideways at the last second |
The most consistent audio cue is the enemy's grunt or shout, which travels further than the visual telegraph. If you hear the audio cue but the enemy is offscreen, you can start your dodge or parry animation before you actually see the swing. Many players report that audio-based reactions are 0.1-0.2 seconds faster than visual-based reactions, which is enough to make a difference against late-game elites.
Color and glow effects also matter. Several bosses in the Goblin Caves and Wildwood Forest add a glowing red or blue tint to their weapons during heavy attacks, and that glow is your final confirmation that a heavy committed swing is about to land. If you see the glow, do not try to parry — the hitbox is too wide and the damage is too high. Instead, dodge away or use a defensive spell to absorb the hit.
Parry Windows, Stagger Rewards, and Commit Decisions
The parry is the most powerful defensive tool in the Dimraeth combat system because it converts an enemy's committed swing into a stagger, which opens them for a critical counterattack that deals roughly 1.5-2.0x normal damage. A successful parry costs only 4-6 stamina, which is the cheapest of any defensive option, but the timing window is narrow. According to community testing, the active parry window lasts roughly 0.15-0.25 seconds depending on your shield tier, and mistiming it costs you the full damage of the incoming hit.
Shield tiers matter because each tier expands the parry window slightly and reduces the stamina cost of blocking. Wooden shields are the starter option and offer the smallest parry window with the highest block cost. Steel shields add a small buffer, and unique shields from the Goblin Caves or Wildwood Forest often come with passive bonuses such as increased parry damage or a brief invulnerability period after a successful riposte. Pairing shield upgrades with a clear understanding of Dimraeth enemy patterns helps you choose the right tool for each encounter.
Parry vs. Block vs. Dodge Decision Table
| Situation | Parry | Block | Dodge |
|---|---|---|---|
| Single fast swing from a weak enemy | Best option, low risk | Acceptable, drains stamina | Overkill, wastes i-frames |
| Heavy committed swing from an elite | Risky, parry window is shorter | Safer, but high stamina cost | Best option, avoid the hitbox |
| Combo attack (3+ swings) | Only parry the first swing | Block first, dodge the rest | Dodge once through the combo |
| Unreadable or new enemy attack | Skip parry until you learn it | Block first to confirm the timing | Safe default for unknown patterns |
| Out of stamina | Cannot parry | Cannot block | Only viable option |
The golden rule is to parry only when you have already seen the attack at least once and know the timing. New enemies should be approached with a block or dodge until you understand their wind-up duration and the precise moment the hitbox activates. Once you have the timing, switch to parries for the stamina savings and counterattack damage.
Recovery punishes are just as important as the parry itself. After a successful parry, you have roughly 1.2-1.5 seconds to land your counterattack, and the window shrinks against faster enemies. Light attacks are usually the safest follow-up because they cost the least stamina and leave you ready to react if the enemy recovers faster than expected. Heavy counterattacks deal more damage but lock you into a longer animation, which is risky against bosses that wake up from stuns in 0.8-1.0 seconds.
Dodging, Stamina Builds, and Movement in Combat
Dodging is the second pillar of the Souls-lite combat loop, and the Dimraeth dodge guide essentially boils down to one principle: i-frames are short, but they are placed at the start of the roll animation. If you time your dodge at the moment the enemy's hitbox activates, you will pass through the attack cleanly. If you dodge too early, you will land before the swing arrives and eat the full hit. If you dodge too late, you will stagger mid-roll and lose your stamina refund.
Direction matters more than players expect. Rolling directly away from an enemy is the worst choice for most attacks because the enemy's committed swing usually tracks a small amount of forward distance. Rolling sideways through the swing is the safer default, and rolling into the enemy's space works best against telegraphed lunges because you end up behind them and open for a backstab punish. The directional i-frames last roughly 0.2-0.3 seconds, which is just enough to slip past a single swing but rarely enough to clear a combo.
Stamina builds optimize for dodge efficiency. The classic setup prioritizes low equip load, fast stamina regen, and a single stat boost that increases your maximum stamina pool. This is the build archetype most speedrunners use, and it is also the safest choice for solo play because it gives you the most recovery options between enemy attacks. If you prefer heavier armor, you can compensate by slotting stamina-regen spells into your five-slot universal magic loadout, because two of the early-game arcane spells boost refill speed for a short duration.
Movement Option Comparison
| Option | Stamina Cost | I-Frame Duration | Best Use Case |
|---|---|---|---|
| Light roll (<30% load) | 15 | 0.25s | Standard combat dodging |
| Medium roll (30-70% load) | 18 | 0.20s | Acceptable for tanky builds |
| Fat roll (>70% load) | 22 | 0.10s | Emergency only, near-useless |
| Backstep | 6 | 0.10s | Quick reposition, cheap but small i-frames |
| Sprint cancel | 4 | None | Reset spacing without committing to a roll |
Sprint cancels are an underrated tool. By tapping the sprint button right after an attack animation, you can reset your position without spending the full stamina cost of a dodge. This is especially useful against ranged enemies because it lets you close distance without rolling directly into a projectile. Many players use sprint-cancel light attacks as their default poke pattern because it spends less stamina than a full dodge and still creates space for the next read.
When the combat system is tuned correctly, mobility and parries together create a rhythm: poke, read, respond, punish, reset. That loop is what makes Dimraeth's combat feel rewarding, and it is also why learning the dodge timing on common enemies is faster than trying to parry everything. Save parries for committed swings you have already seen, and use dodges for everything else.
Spell Synergy, Universal Magic, and the Five-Slot Loadout
Dimraeth's universal magic system lets you equip up to five spells at a time from a pool of more than 300 total spells, which means every combat encounter can be approached with a custom loadout tailored to the enemy type. The system is gated by attribute requirements, so a low-intelligence Brawler cannot slot high-tier fireballs without first raising the relevant stat or crafting a spellbook that bypasses the requirement. According to the Dimraeth on Steam page, the crafting system lets you build spellbooks that enable universal magic across all six classes, which is the key to hybrid builds.
The five-slot limit forces real trade-offs. You cannot carry a heal, a damage spell, a crowd control option, a mobility tool, and a buff simultaneously — at least not without swapping slots at a rest point. Most experienced players build two or three preset loadouts and switch between them based on the encounter. A typical boss loadout might include a damage spell, a defensive buff, a stamina-regen utility, and two flex slots for elemental coverage. A typical trash-clear loadout might swap the defensive buff for an area-of-effect damage spell and add a pull or knockback utility for grouping enemies.
Spell Slot Archetypes
| Slot | Trash Clear | Boss Fight | Hybrid Solo |
|---|---|---|---|
| Slot 1 | AoE damage | Single-target nuke | Burst finisher |
| Slot 2 | Pull/knockback | Defensive buff | Stamina regen |
| Slot 3 | Mobility (dash/blink) | Heal over time | Heal over time |
| Slot 4 | Elemental coverage | Elemental coverage | Elemental coverage |
| Slot 5 | Flex | Flex (utility or buff) | Flex (situational) |
Spell synergy with melee attacks is where the Magician class shines. The typical combo is to open with a ranged spell to weaken or stagger the enemy, then close distance with a dodge or sprint-cancel, then land a heavy melee swing during the enemy's recovery. This sequence costs more stamina than a pure melee rotation, but it deals substantially more damage and is the safest way to take down elite enemies that can survive three or four melee swings.
Crafting and combat intersect here. If you want a specific spell on your bar but do not meet the attribute requirement, you can craft a universal spellbook that grants access without the stat gate. The crafting path for spellbooks ties directly into your base-building progression, and the Dimraeth crafting guide covers the recipe discovery loop in detail. For most Early Access players, the priority is to craft one or two staple spellbooks for your main damage school before investing in niche utility spells.
Pre-Fight Preparation and the Early Access Loop
Preparation matters as much as execution in Dimraeth's combat system. The game rewards players who enter each encounter with full stamina, a pre-applied food buff, and a five-slot spell loadout tailored to the enemy type. Food buffs come from the cooking system and last 10-20 minutes depending on the recipe, which makes them ideal for boss runs and dungeon clears. Stamina-regen meals are the most popular pre-fight choice because they shorten the recovery window between dodges and parries, but damage buffs and elemental resistance meals also have specific use cases.
The Early Access build of Dimraeth features a world boss and elite rotation tied to daily and weekly cycles. According to community reports, the recommended pre-fight checklist before any elite or boss pull looks like this:
-
Confirm your stamina bar is at full by resting at the nearest checkpoint or bonfire.
-
Apply a food buff that matches the encounter type (stamina regen for solo, damage boost for groups).
-
Review the enemy's elemental weaknesses and slot the matching damage spell into your five-slot bar.
-
Clear nearby trash mobs so the boss pull does not include adds.
-
Position yourself so the boss approaches from a known angle without flanking enemies.
Difficulty levels in the current Early Access patch change enemy damage, health, and aggression but do not alter telegraphs. This means the parry and dodge timings you learn on Normal carry directly into Hard and Nightmare, which is good news for players who invest time in the combat fundamentals. If you are new to the game, starting on Normal and learning the full combat loop before bumping difficulty is the cleanest path to long-term progression, and pairing that with the foundational advice in the Dimraeth beginner guide sets you up for every act and region.
Recovery from a failed pull is part of the system. When you die, you respawn at the last checkpoint, your food buff expires, and any spells you crafted for that specific encounter are still in your spellbook but must be re-equipped. Most players use the recovery run as a learning opportunity: walk back to the boss room, observe the trash mobs and environmental hazards, and re-engage only when the food buff is reapplied and the spell loadout is confirmed. This rhythm of prepare, engage, recover, refine is what makes the Dimraeth Souls-lite combat system feel fair even when the difficulty curve spikes.
Frequently Asked Questions
What is the best way to learn Dimraeth parry timing?
Start with the goblin skirmishers in the Earlwood Village outskirts because their attacks are slow and heavily telegraphed. Practice parrying the overhead swing, then the horizontal slash, then the lunge. Once you can parry all three consistently, move to the early elites in the Wildwood Forest, which have shorter parry windows. The parry timing transfers between enemies because Dimraeth's combat system uses consistent wind-up lengths per attack type, not per enemy model.
Should I prioritize stamina regen or max stamina for my build?
Stamina regen is the better stat for most builds because the Dimraeth combat system punishes downtime more than it punishes total pool size. A medium stamina pool with fast regen lets you chain more actions per minute than a large pool with slow regen, and it also keeps your equip load lower because regen-focused gear tends to be lighter. Save the large-pool investment for tank builds that intentionally want to absorb multiple hits in a combo.
How do I dodge through combo attacks without running out of stamina?
Dodge only the committed swings, not the wind-ups, and never dodge more than twice in a single combo. A typical three-hit combo can be cleared with one well-timed dodge through the second swing plus a parry or block on the third, which costs less stamina than three full rolls. If the combo extends past three hits, your best option is to back away and wait for the recovery window rather than commit more dodges.
Can I use magic effectively in a Souls-lite melee build?
Yes, the five-slot universal magic system is designed for hybrid play. Most successful Magician builds open with a spell to stagger or weaken the enemy, then close distance for a melee punish, then use a defensive spell or stamina-regen utility to recover. The key is to keep your stamina pool high enough to support both melee swings and spell casts without running dry, which usually means investing in at least one regen-focused item slot.
What should I do if I keep dying to the same enemy?
Stop trying the same approach. If you are dying to a specific attack pattern, switch from parry attempts to dodges, or vice versa. Many deaths in the Dimraeth souls lite combat loop come from forcing a parry build against an enemy with unreadable telegraphs, when a dodge-first approach would clear the encounter with less risk. Re-equip your spell loadout, re-apply a food buff, and approach the fight with a different defensive response for each attack type.